---
title: AuthKit 🤝 FastMCP
sidebarTitle: AuthKit
description: Secure your FastMCP server with AuthKit by WorkOS
icon: shield-check
---
import { VersionBadge } from "/snippets/version-badge.mdx"
This guide shows you how to secure your FastMCP server using WorkOS's **AuthKit**, a complete authentication and user management solution. This integration uses the [**Remote OAuth**](/servers/auth/remote-oauth) pattern, where AuthKit handles user login and your FastMCP server validates the tokens.
AuthKit does not currently support [RFC 8707](https://www.rfc-editor.org/rfc/rfc8707.html) resource indicators, so FastMCP cannot validate that tokens were issued for the specific resource server. If you need resource-specific audience validation, consider using [WorkOSProvider](/integrations/workos) (OAuth proxy pattern) instead.
## Configuration
### Prerequisites
Before you begin, you will need:
1. A **[WorkOS Account](https://workos.com/)** and a new **Project**.
2. An **[AuthKit](https://www.authkit.com/)** instance configured within your WorkOS project.
3. Your FastMCP server's URL (can be localhost for development, e.g., `http://localhost:8000`).
### Step 1: AuthKit Configuration
In your WorkOS Dashboard, enable AuthKit and configure the following settings:
Go to **Applications → Configuration** and enable **Dynamic Client Registration**. This allows MCP clients register with your application automatically.
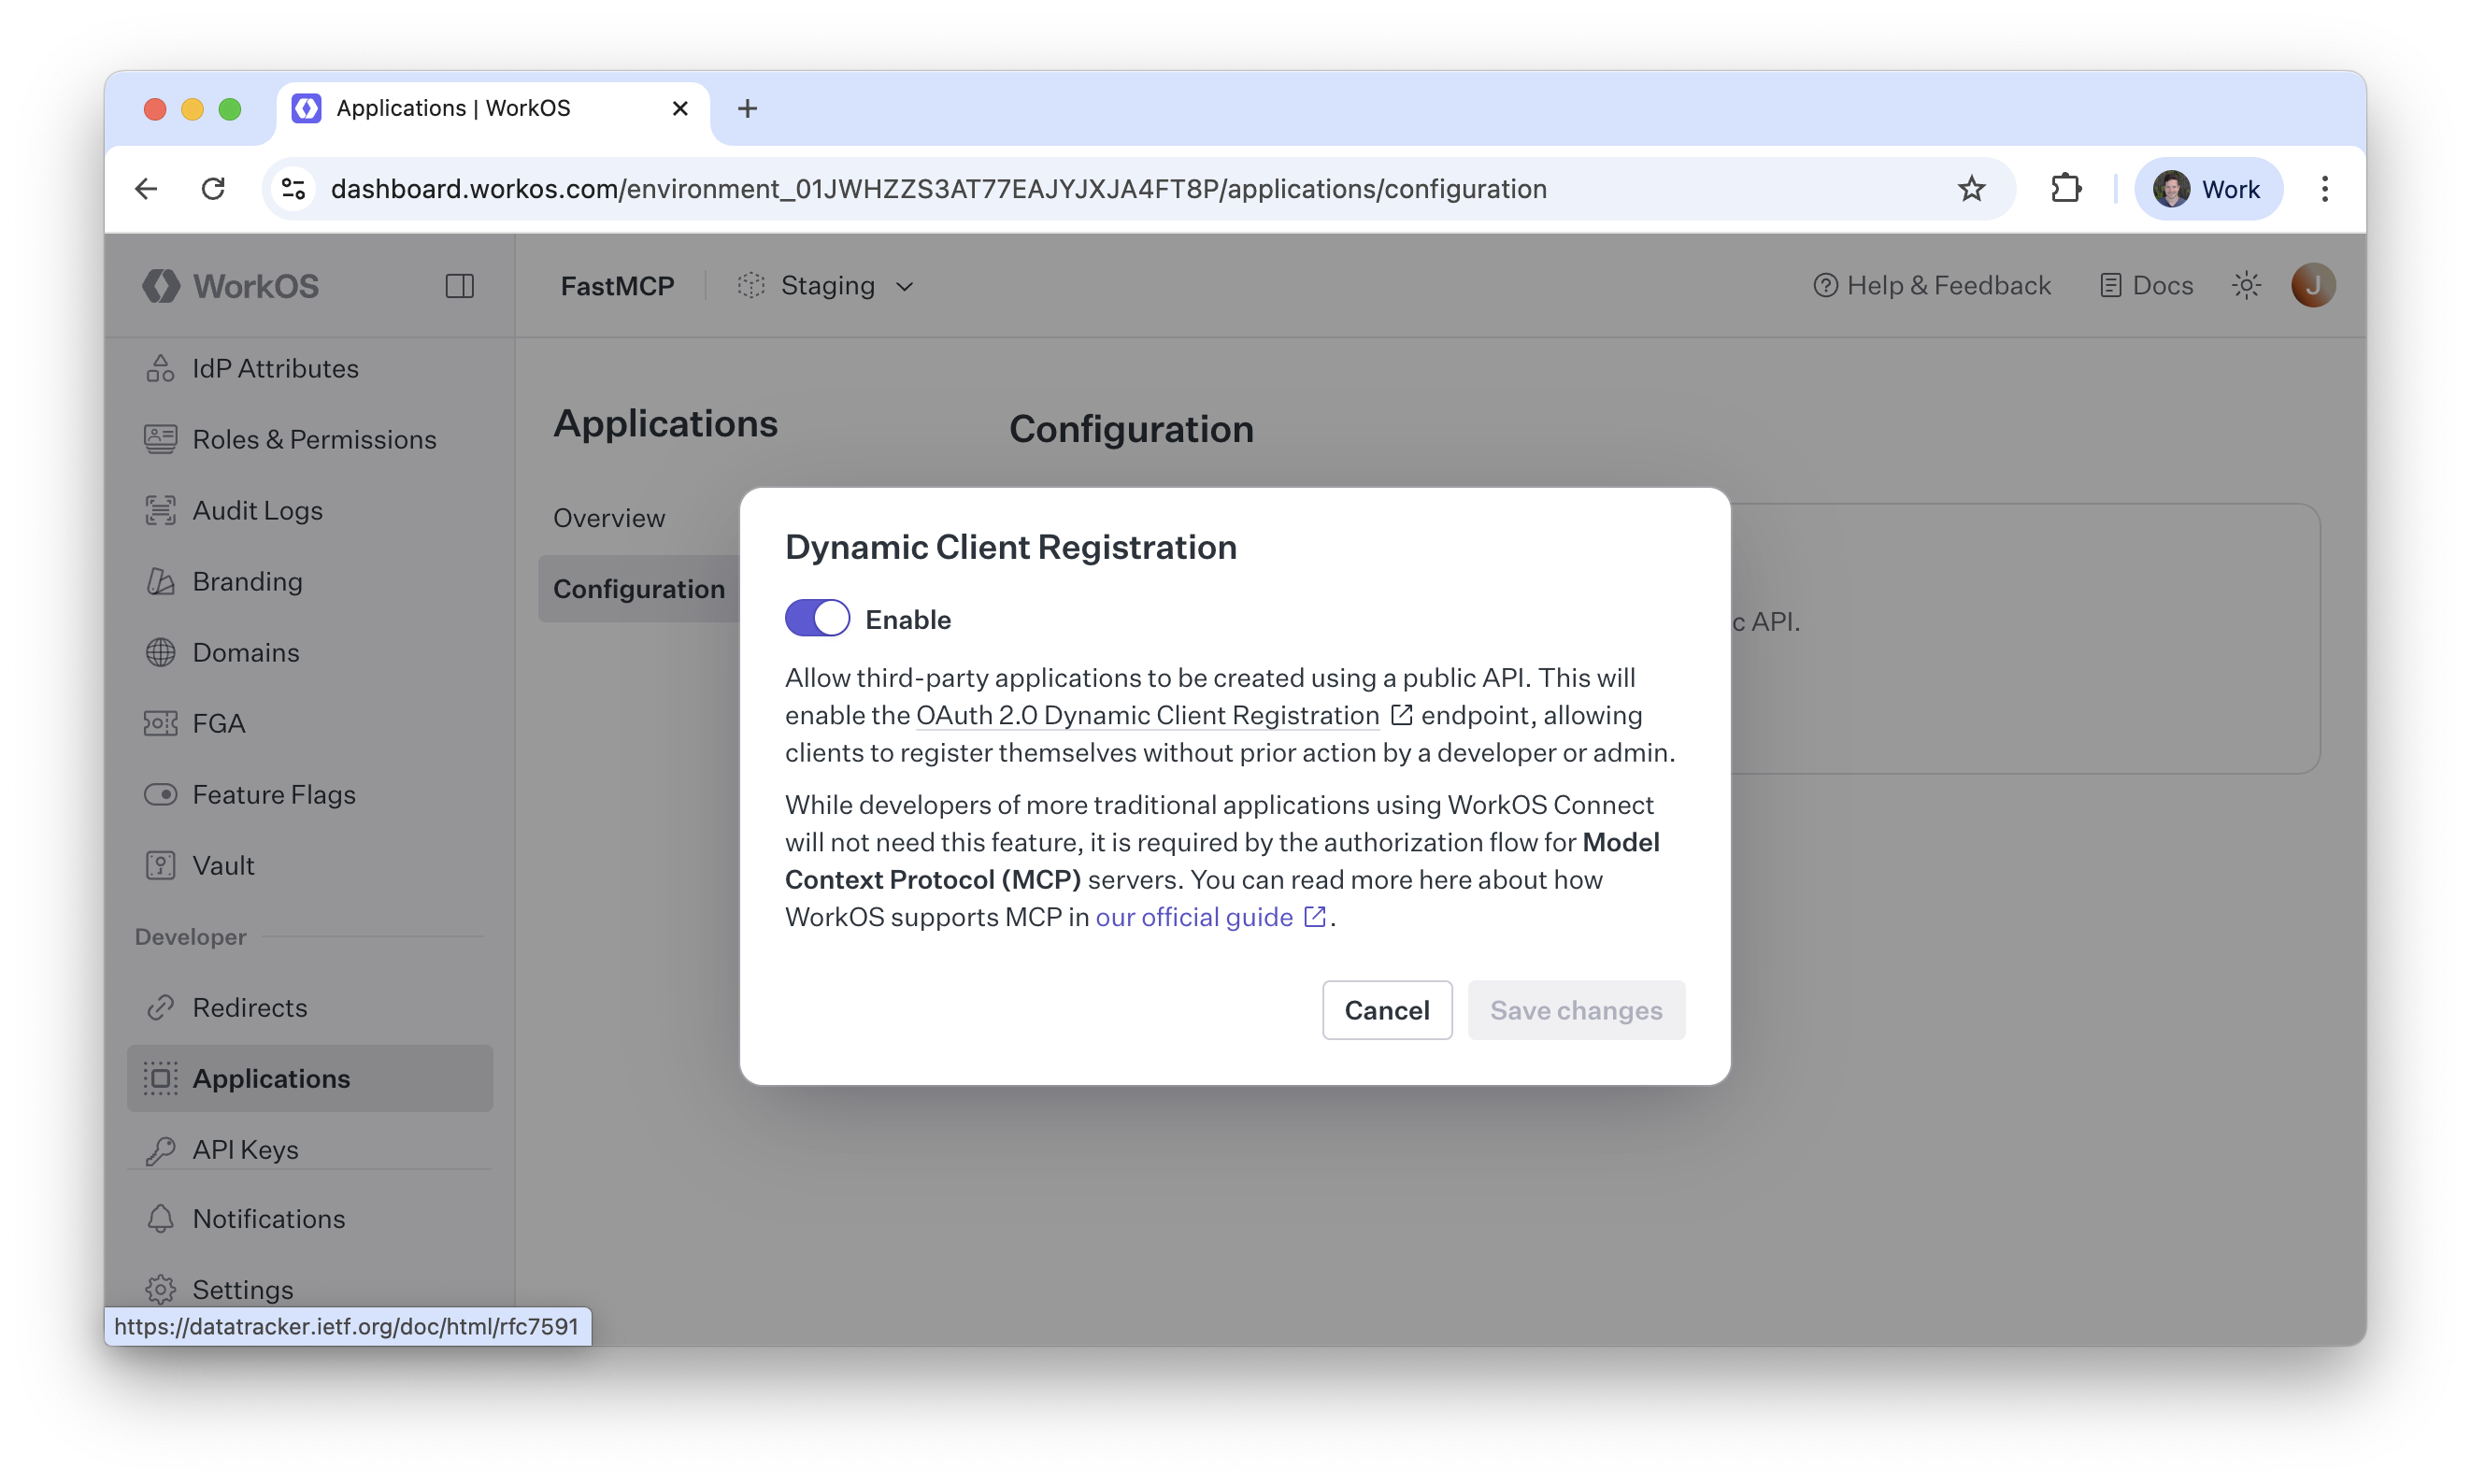
Find your **AuthKit Domain** on the configuration page. It will look like `https://your-project-12345.authkit.app`. You'll need this for your FastMCP server configuration.
### Step 2: FastMCP Configuration
Create your FastMCP server file and use the `AuthKitProvider` to handle all the OAuth integration automatically:
```python server.py
from fastmcp import FastMCP
from fastmcp.server.auth.providers.workos import AuthKitProvider
# The AuthKitProvider automatically discovers WorkOS endpoints
# and configures JWT token validation
auth_provider = AuthKitProvider(
authkit_domain="https://your-project-12345.authkit.app",
base_url="http://localhost:8000" # Use your actual server URL
)
mcp = FastMCP(name="AuthKit Secured App", auth=auth_provider)
```
## Testing
To test your server, you can use the `fastmcp` CLI to run it locally. Assuming you've saved the above code to `server.py` (after replacing the `authkit_domain` and `base_url` with your actual values!), you can run the following command:
```bash
fastmcp run server.py --transport http --port 8000
```
AuthKit defaults DCR clients to `client_secret_basic` for token exchange, which conflicts with how some MCP clients send credentials. To avoid token exchange errors, register as a public client by setting `token_endpoint_auth_method` to `"none"`:
```python client.py
from fastmcp import Client
from fastmcp.client.auth import OAuth
import asyncio
auth = OAuth(additional_client_metadata={"token_endpoint_auth_method": "none"})
async def main():
async with Client("http://localhost:8000/mcp", auth=auth) as client:
assert await client.ping()
if __name__ == "__main__":
asyncio.run(main())
```
## Production Configuration
For production deployments, load sensitive configuration from environment variables:
```python server.py
import os
from fastmcp import FastMCP
from fastmcp.server.auth.providers.workos import AuthKitProvider
# Load configuration from environment variables
auth = AuthKitProvider(
authkit_domain=os.environ.get("AUTHKIT_DOMAIN"),
base_url=os.environ.get("BASE_URL", "https://your-server.com")
)
mcp = FastMCP(name="AuthKit Secured App", auth=auth)
```